
Vendor Credits and Refunds seem to stump users. I’ve often found users who have created income accounts for credits and refunds. This has led me to believe there could be a short circuit in their understanding of the bookkeeping associated with vendor credits and refunds.
Vendor credits and refunds are designed to credit the original account used to make the purchase. For example, if a bar purchases a case of vodka, but one of the bottles arrives broken, the vendor normally will issue a credit to remove the expense of the broken bottle.
There really are three workflows we should consider (see flowchart below).
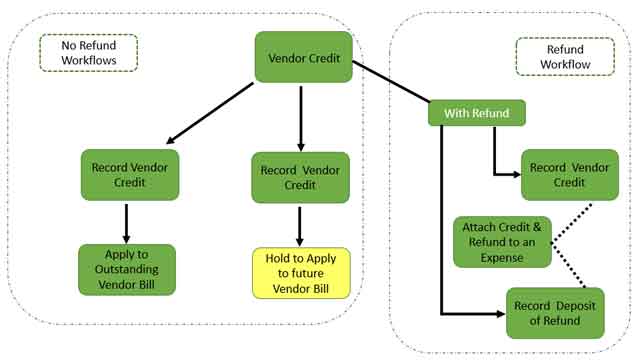
In the above illustration, the two workflows on the left represent those in which a credit, but no refund, has been issued. On the right is the workflow in which the credit is transmitted with the corresponding refund. So, your three workflows are:
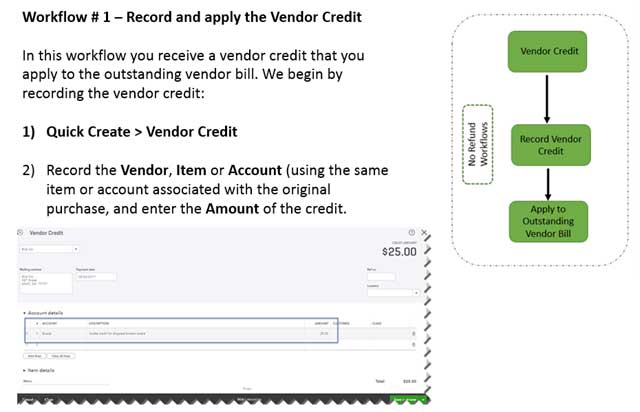
Workflow No. 1 – You receive a vendor credit that you apply to the outstanding vendor bill. In my example above, the Liquor Distributor immediately forwards you a credit for the broken bottle so you can apply that credit against the vendor’s bill for the case of vodka.
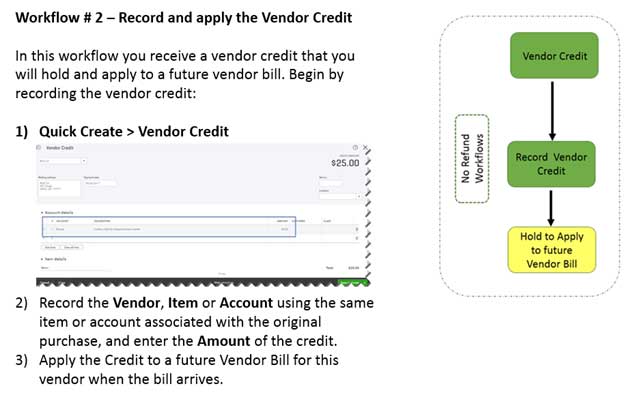
Workflow No. 2 – You receive a vendor credit that you “hold onto” until you can apply it to your next Vendor Bill. In our liquor example, the vendor’s credit and your payment for the vendor’s bill cross in the mail, so you simply retain the vendor credit and apply it to the next bill the vendor sends you.
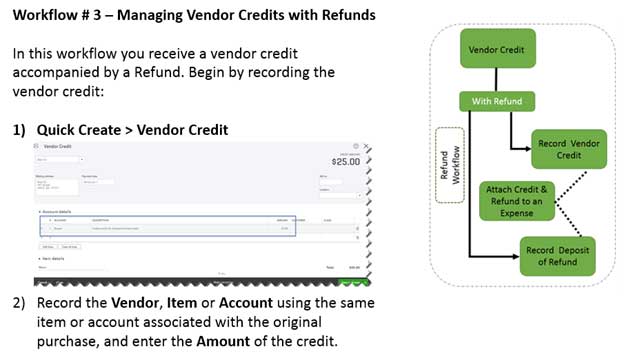
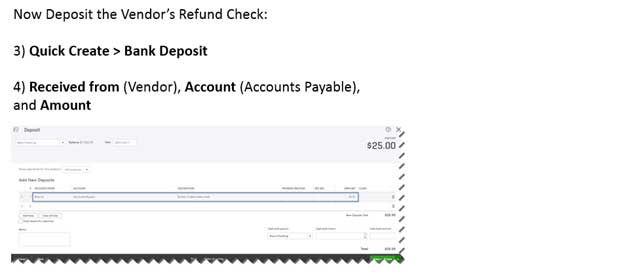
Workflow No. 3 – The vendor issues you a credit along with a refund for the value of the credit. You must deposit the credit and record what the refund was for.
Now we’ll look at the steps you should take in QuickBooks Online for each of the three workflows. But before we do, we should take a look at one of the optional features you may want to configure in QBO – “Automatically apply credits.”
Automatically apply credits (Option)
QBO has the option to automatically apply credits, but you must turn this feature on to take advantage of it. To activate this option, follow these steps:
+ Gear Icon > Account and Setting
+ Advanced > Automation
+ Automatically apply credits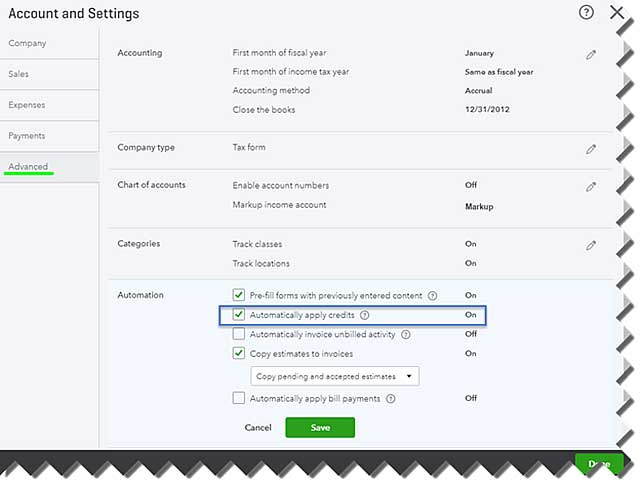
The third workflow is a little more complicated, because it involves the issuance of both the vendor’s credit against the prior vendor bill and a refund for the value of that credit. In other words, you get a check from the vendor that must be deposited.
Typically, this occurs where you already have paid the Vendor’s Bill for the original purchase prior to receiving their credit. In many ways, this is similar to the scenario of workflow No. 2, but rather than you applying the vendor credit to a vendor bill in the future, you must offset it against the refund you receive.
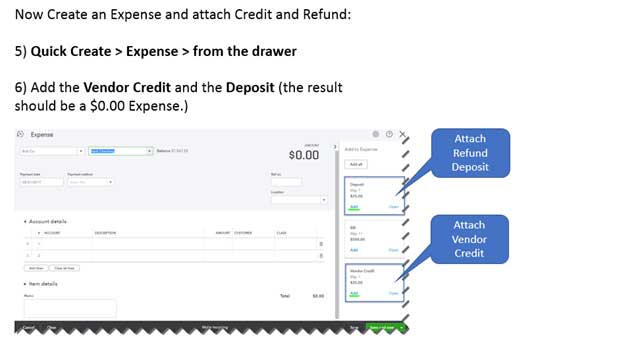
QBO then will auto create a zero-dollar bill payment (as shown below):
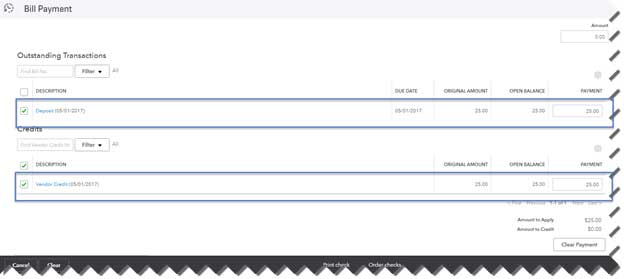
Everything now is recorded properly and all our transactional records tie back to each other.
Nuggets of Wisdom
Vendor credits and refunds are tricky for users and don’t happen often enough for most users to really learn these workflows, so it’s a good idea to ask your QuickBooks ProAdvisors for help with them to ensure best bookkeeping practices for QBO